Install Nest UK thermostat and Nest Heat Link (3rd Gen)
This guide explains how to replace a Danfoss TP9000 programmer and the accompanying Danfoss TS2 thermostat unit (that are found in new homes with two-zone boiler configuration) with a Nest 3rd generation thermostat and Nest Heat Link. Leave your comments and questions and I’ll be happy to respond.
Nest-approved installation services quoted us between £85-£150 for their services. This guide may help you learn a bit about your home heating systems and your Nest thermostat, and save some cost in the process (see Disclaimer below).
What you’ll need
- Nest thermostat (3rd Gen)
- A screwdriver (or two)
- Plyers
Step 1: Open the TP9000 and TS2
Turn off the boiler to ensure electric supply is off before working with these devices. Unscrew the Danfoss TP9000 (Programmer) and TS2 (Thermostat). These have screws at the bottom and are easy to spot.
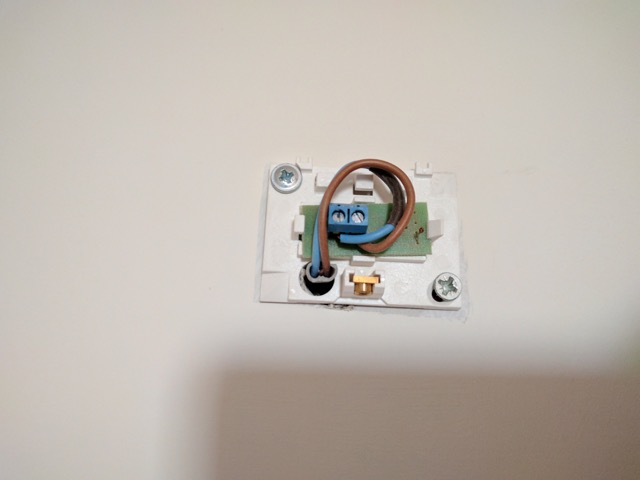
Once opened, here’s what they looked like for our system.

TP9000 and TS2

TP9000 programmer wiring
TS2 thermostat wiring
Step 2: Understand the wiring, boiler system and connect Nest Heat Link
Refer to the Danfoss TP9000 wiring guide (Danfoss wiring guide here) shown below.
Refer to the Nest wiring guide (Nest UK guide here). It describes the S-Plan wiring on page 24. For a two-zone system that we have, this was the appropriate wiring for our boiler. You’ll need to determine your boiler electric plan from the guide and make an informed decision. Getting this wrong could be costly.
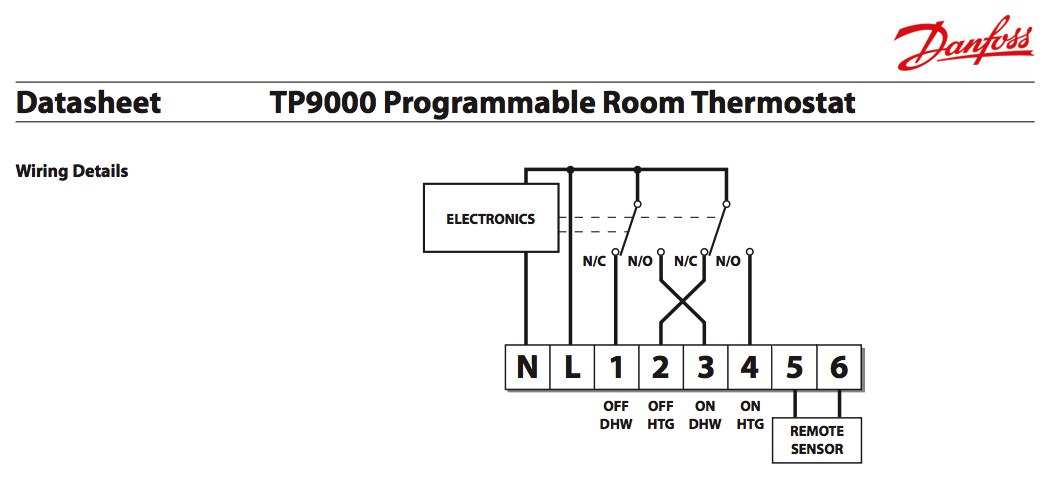
TP9000 Danfoss wiring
Note the ON DHW and ON HTG for connections 3 and 4 above in the TP9000 wiring.
For S-Plan boiler system, the ON DHW (3) will connect into 6 (Call-for-heat) of the Nest Heat Link and ON HTG (4) will connect into 3 (Call-for-heat) of the Nest Heat Link. I also fed the live from L to 2 and again, from 2 to 5 on the heat sink (note the brown wires in my Nest Heat Link below).
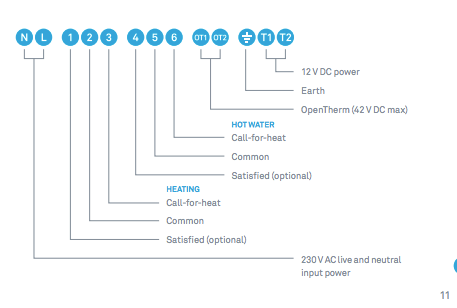
Nest Heat Link wiring (page 11)
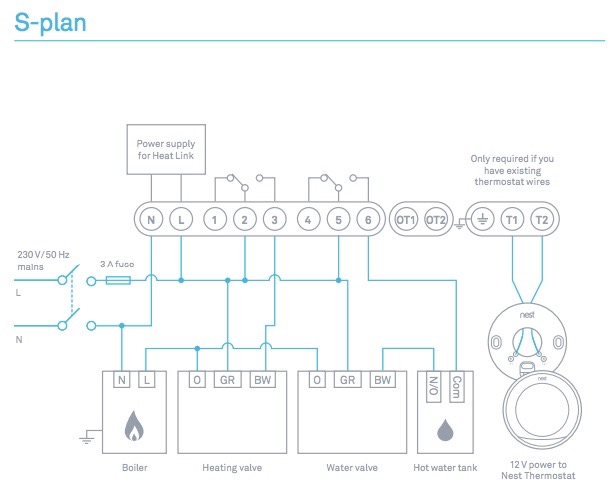
Nest S-plan wiring (page 24)
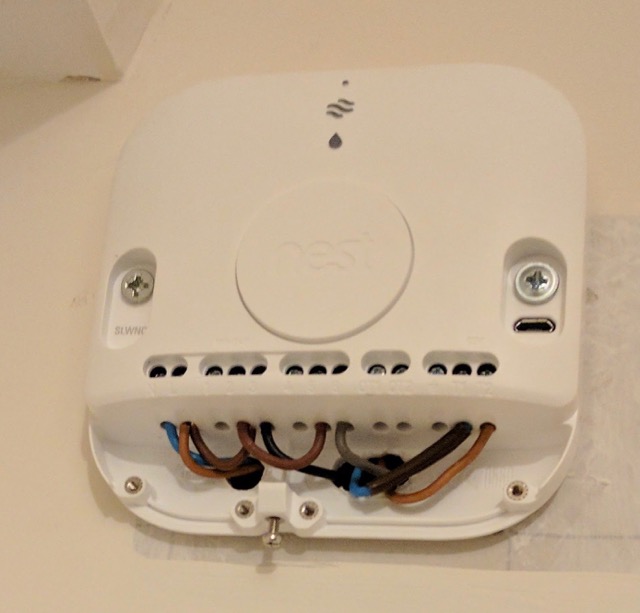
Nest Heat Link wiring
Step 3: Connect the Nest Thermostat
- Connect T1 and T2 from Heat Link to T1 and T2 of Nest Thermostat. If you’re planning to use the USB power supply and leave it on a desk mount, this may not be required.

Nest Thermostat wiring
Step 4: Turn on the power supply and configure
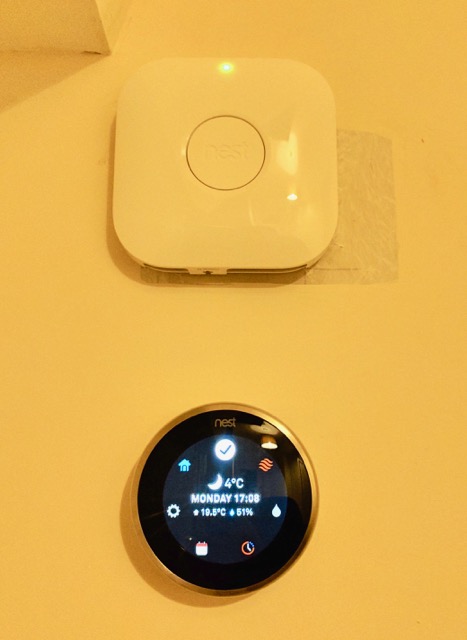
Nest Configured and Working
Enjoy!
